
Cleat hitch
Hitche · easy · also called Making fast to a cleat, Belaying to a cleat
Used for
- Making a dock line fast to a horn cleat on the boat or on the dock
- Holding a rope anchor rode or snubber on the bow cleat
- Tying off a fender line to a deck or dock cleat
- Securing halyard and sheet tails on a sailboat's mast or cockpit cleats
How to tie it
- If you can, stand so the cleat is between you and whatever the line is pulling on.
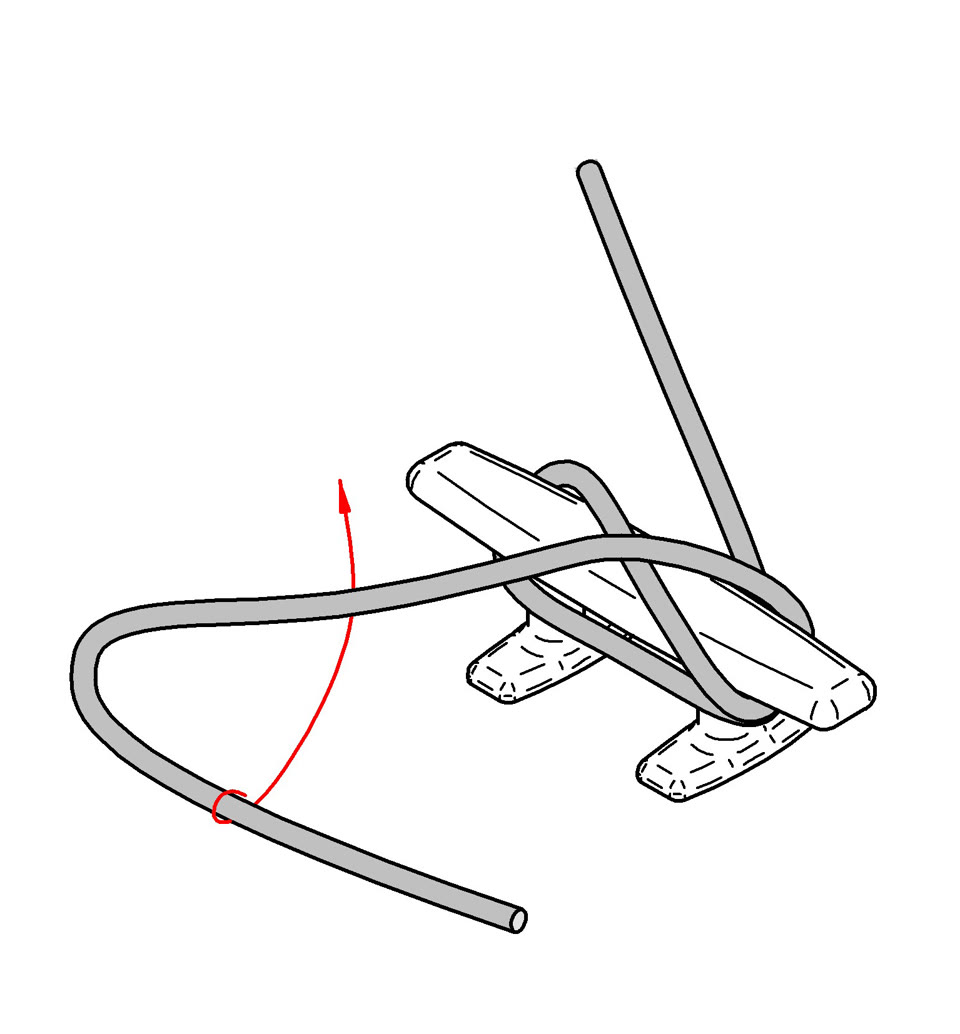
- Lead the line to the horn farthest from the load and pass it under that horn.
- Carry it on around the base of the cleat and under the near horn.
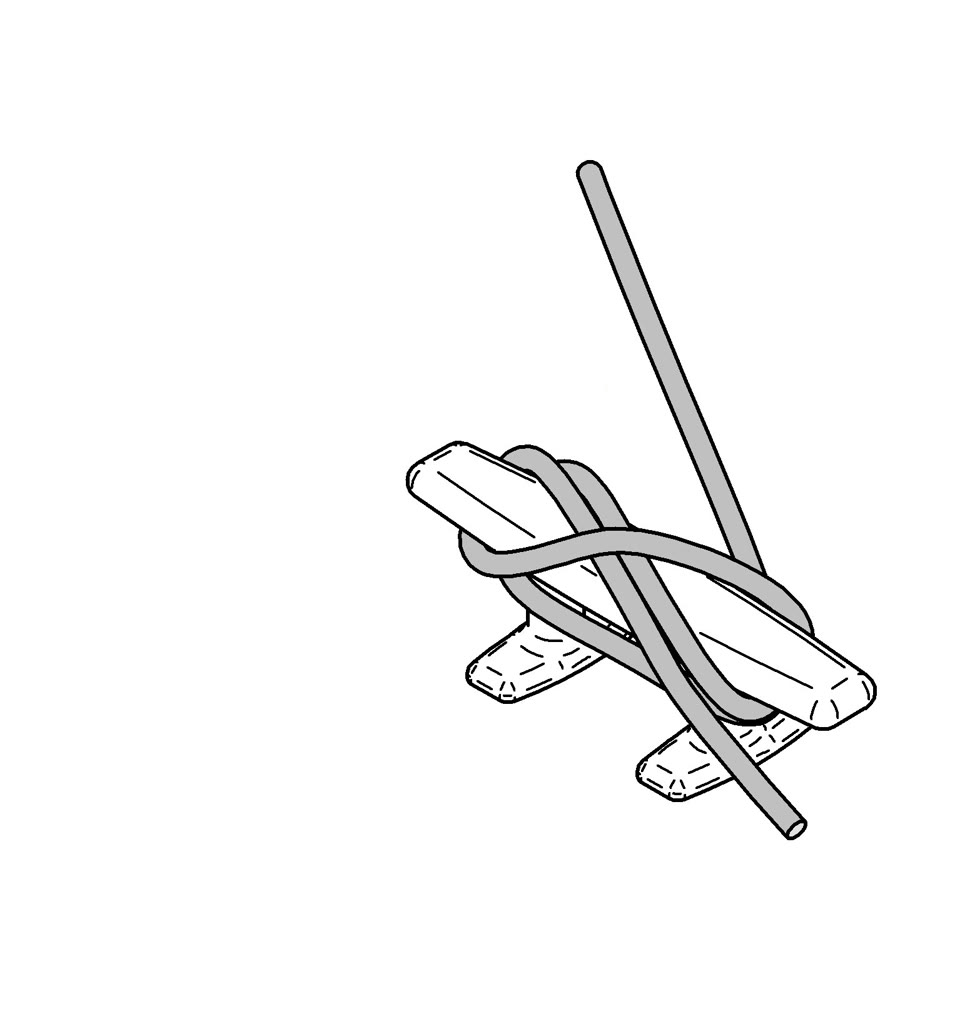
- Cross diagonally over the top of the cleat and pass the line under the far horn again. That is your figure-eight.
- Twist a small loop into the line so the tail ends up underneath, and drop the loop over the near horn. This is the single locking hitch.
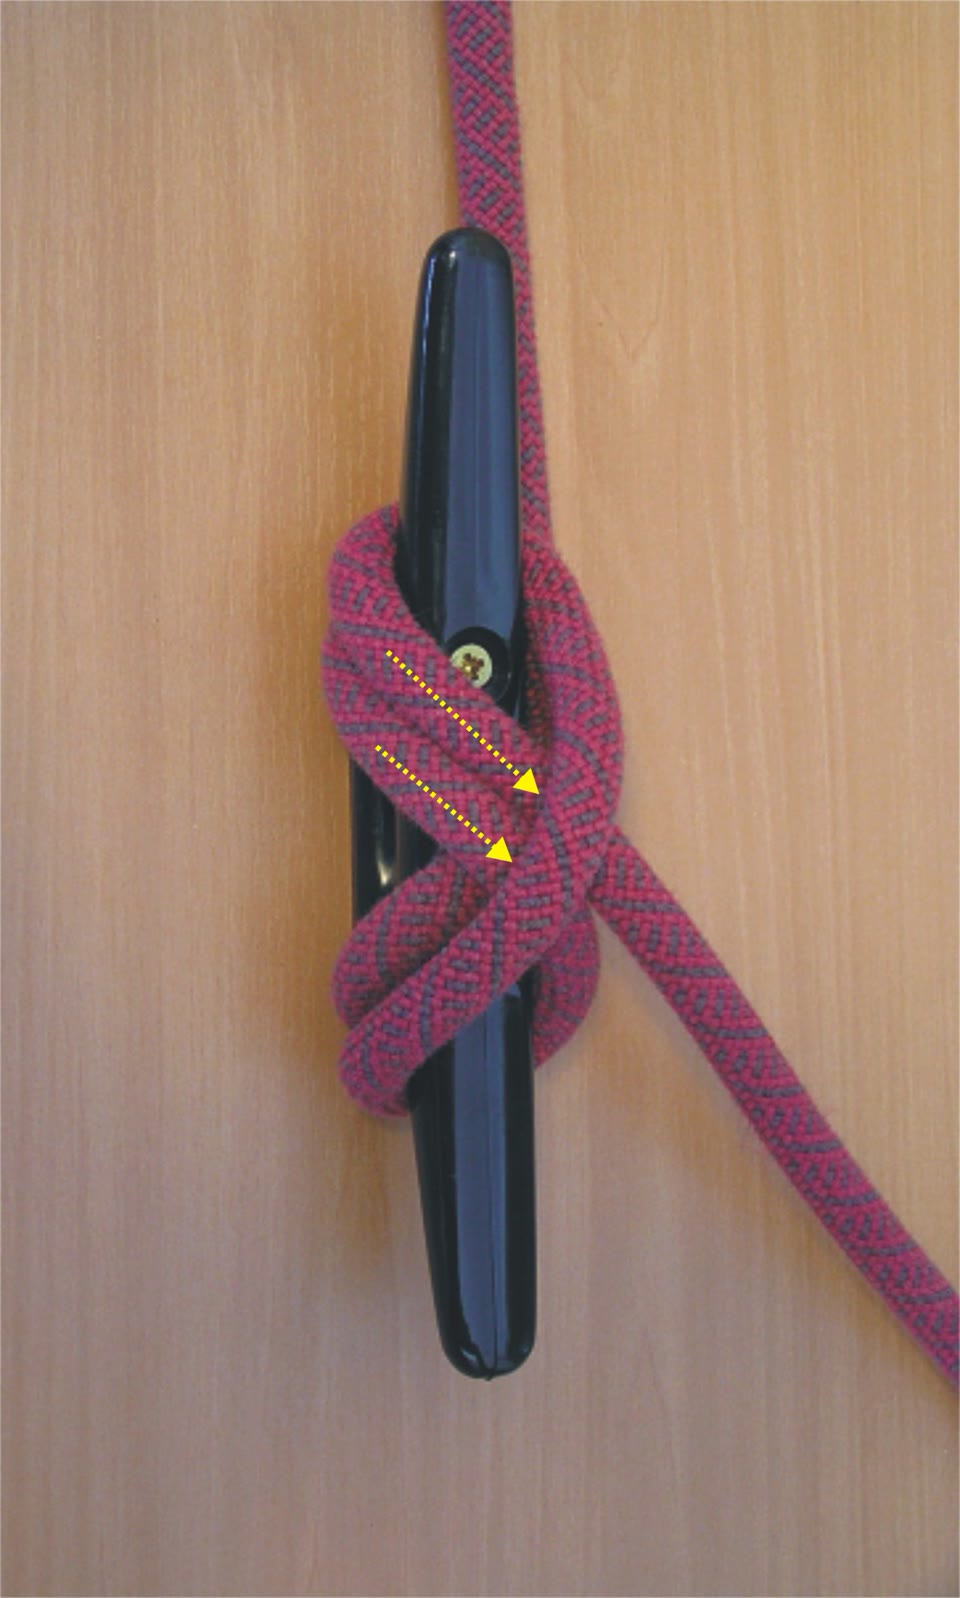
- Pull the tail snug so the hitch lies flat, right beside the diagonal underneath it.
- Coil, flake or flemish the leftover tail so it is out of the walkway.
Check it: From above you see two diagonals lying side by side across the top of the cleat, and the tail tucked under the last one, leaving the cleat on the opposite side from where the line came in. If the tail crosses over the diagonal instead of lying beside it, the hitch is flipped the wrong way; take it off and flip it the other way.
- Use only one locking hitch. Extra hitches and piles of crossings add no holding power, but under a heavy load they can jam so the line cannot be freed quickly when you need it.
- If a line may need to be let go while heavily loaded (a towline, a spring line you will pivot on, a lock line), leave off the locking hitch and use extra figure-eights, with someone tending it. The Coast Guard makes towlines up with a round turn and figure-eights so they can be cast off in an emergency.
- Thin or slippery line on a big cleat can creep. Either take one full turn around the base before the first crossing, or add one more figure-eight before the locking hitch. Do not wind extra turns around the base; that is what binds.
- Match line to cleat. The Coast Guard and BoatUS Foundation both give roughly 1 inch of cleat length per 1/16 inch of line diameter: a 6-inch cleat for 3/8-inch line, 8-inch for 1/2-inch.
- Keep fingers out of the turns while the line is loaded, and never stand inside a loop of line.
- Getting ready for a storm surge that may put cleats under water, BoatUS ties each tail off to its standing part with half hitches so it cannot shake loose.
To untie: Lift the locking hitch off the horn, then unwind the figure-eight. The turn around the base lets you ease the line out under control.
Sources (10)
boatus.com · boatingcompass.org · higherlogicdownload.s3.amazonaws.com · navytribe.com · captnmike.com · practical-sailor.com · boatus.org · boatus.com · en.wikipedia.org · americasboatingclub.org
General guidance for recreational boaters, researched from the sources listed and written in our own words. Your equipment manuals, local knowledge, the Navigation Rules and a qualified instructor come first.